Leave Your Message

How to Choose the Right No Hub Fittings?

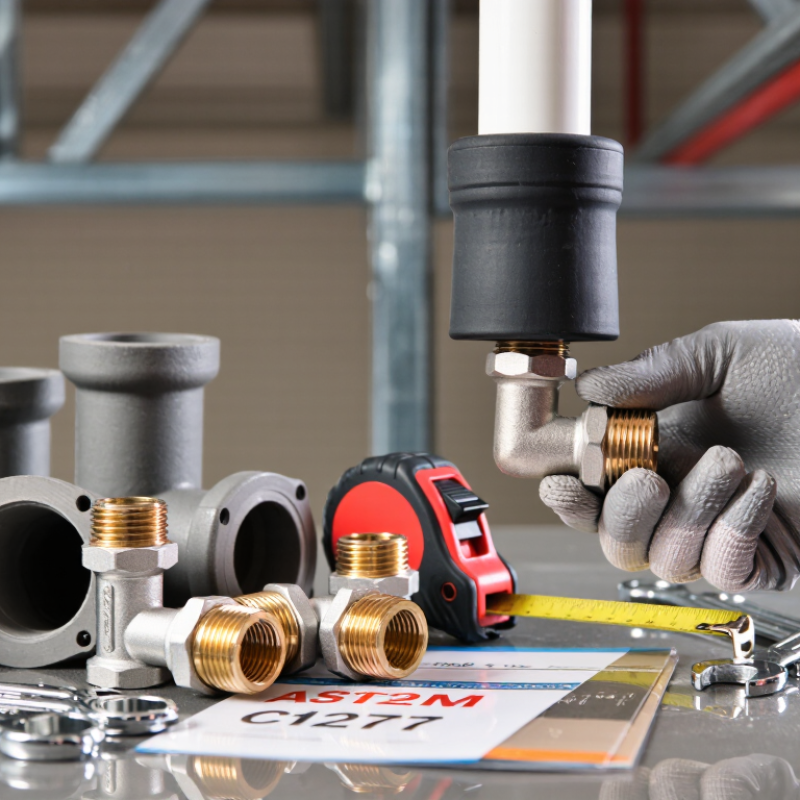
Choosing No Hub Fittings is a small decision with a large impact on a drainage system. The right coupling must match the pipe material, outside diameter, and installation conditions. A mismatch may look minor on a workbench. Under a ceiling, it can mean cutting out a leaking joint.

The U.S. Census Bureau reported that construction spending reached an estimated $2.15 trillion in 2024, underscoring the scale of the built environment these components serve. That figure covers construction broadly, not no-hub products specifically. For product selection, technical standards are more useful. ASTM C1277 covers shielded couplings used to join hubless cast-iron soil pipe and fittings, while ASTM C564 addresses elastomeric gaskets. Check the applicable standard and the manufacturer’s specifications for each assembly.

Look closely at the details. Is the fitting intended for the pipe’s actual outside diameter? Does its shield provide the restraint the installation requires? Will the joint remain accessible for inspection? A stainless-steel band and a rubber sleeve are not interchangeable with every connector.

No shortcuts here. Expert quotations should be verified against a named, attributable source; none was available to confirm for this introduction, so no individual quote is invented. That matters. A credible selection guide should distinguish documented requirements from sales claims, and product dimensions from assumptions. The sections ahead explain how to compare materials, verify compatibility, and choose No Hub Fittings with confidence—while recognizing that field conditions can still complicate a seemingly simple connection.
How to Choose the Right No Hub Fittings?

Understand How No-Hub Fittings Connect Drainage Pipes

How to Choose the Right No Hub Fittings?

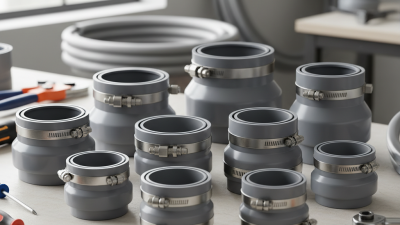
No-hub fittings connect drainage pipes without a bell-shaped socket. A flexible elastomeric sleeve fits over the meeting pipe ends, while a metal shield and bands hold the joint together. The shield helps keep the connection aligned. The sleeve forms the seal.

Check the pipe material and outside diameter before choosing a coupling. Standard no-hub couplings are commonly used with compatible cast-iron soil pipes. Connecting different materials may require a transition coupling designed for both pipe types. A close fit matters. A coupling should not be used to hide badly mismatched ends.

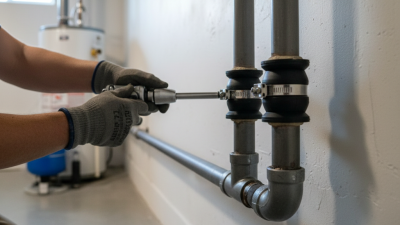
Clean the pipe ends and check for cracks, burrs, or debris that could damage the sleeve. Slide the coupling into place, align the pipes, and tighten the bands evenly with a calibrated torque wrench. Follow the fitting manufacturer’s torque and installation instructions; overtightening can distort components, while uneven tightening may leave the joint poorly supported. Keep the pipes supported so their weight does not pull on the connection. I still double-check alignment before tightening. It is easy to miss. After installation, inspect the joint and test the drainage system for leaks, especially where pipes are exposed or access is limited.
Identify Pipe Material, Diameter, and System Requirements

Before choosing a no-hub fitting, identify the pipe material at the connection. Cast iron, PVC, and ABS are not interchangeable just because their openings look similar. Check the pipe marking, then measure its outside diameter; nominal size alone can mislead. A coupling must be listed for the materials and dimensions it joins. A mismatch may leave a small leak behind a wall or ceiling. Easy to miss.

Diameter matters, too. ASTM A888 covers hubless cast-iron soil pipe in nominal sizes from 1.5 to 15 inches. That range is useful, but it does not replace measuring the pipe itself. For hubless cast-iron joints, ASTM C1277 sets requirements for shielded couplings. Check the coupling’s size range and required torque against its installation instructions. Do not guess by eye.

Finally, match the fitting to the system. Confirm whether the line carries sanitary drainage, vent flow, or another service, and check local plumbing-code requirements for slope, load, and approved materials. No-hub connections are commonly used in drainage systems; they are not automatically suitable for pressurized service. A close fit is not enough. Before closing the wall, inspect alignment and make the required leak test. I would still verify the markings twice—especially on older pipe, where paint can hide the original material.

Compare Fitting Types, Materials, and Performance Ratings

No-hub fittings connect cast-iron drain pipes without threaded ends, but the coupling type matters. A standard shielded coupling uses a rubber sleeve, stainless-steel shield, and clamps to keep the joint aligned. It suits many above-ground drainage connections when the pipe sizes and installation requirements match. Unshielded sleeves are simpler, but they may not provide the support required for every application. Heavy-duty shielded couplings offer added rigidity where the specification calls for it. More metal does not automatically mean a better fit.

Compare materials and ratings before choosing. Elastomer sleeves are commonly made from materials such as neoprene or EPDM; check the manufacturer’s stated compatibility with the waste, temperature, and environment. Stainless-steel bands and clamps resist corrosion, though grade and construction vary. Read the fitting’s performance data for the intended pipe diameter, service conditions, and applicable standard. Drainage couplings are not automatically suitable for pressurized lines. Check the markings. A practical installation check is to confirm that the pipe ends are clean, evenly cut, and fully inserted before tightening clamps to the specified torque. Small alignment errors can matter. It is easy to focus on the rating and overlook the actual pipe dimensions, so verify both before buying.

How to Choose the Right No Hub Fittings?

Compare fitting types, materials, and performance ratings

Standard shielded couplings covered by CISPI 310 are typically tightened to 60 in-lb; heavy-duty shielded couplings covered by ASTM C1540 are typically tightened to 80 in-lb. These are installation torque values—not pressure ratings. No-hub couplings commonly use an elastomeric gasket with a metal shield and stainless-steel bands; check the product marking and installation instructions, since requirements can vary.

Match the Fitting Configuration to the Plumbing Layout

Choosing a no-hub fitting starts with the actual pipe layout, not the fitting shelf. Map each connection: straight runs need a coupling, while changes in diameter or direction may require a reducer or an approved offset. Confirm pipe outside diameters and materials before ordering. A small mismatch can leave the band uneven or the joint under strain. Measure twice. Check the drawing against the space around the pipe, too; a tidy plan can hide a cramped joint.

Allow room to assemble and inspect each connection, especially near walls, joists, and cleanouts. The U.S. EPA’s WaterSense Fix a Leak Week guidance estimates household leaks waste nearly 10,000 gallons of water annually, underscoring why sound joints matter. That figure covers household leaks broadly, not no-hub joints alone. ASTM C1277 addresses shielded couplings for hubless cast-iron soil pipe, so verify that the chosen coupling suits the pipe and application. Follow the manufacturer’s installation instructions and applicable plumbing code. An offset may solve an alignment problem, but it can also make future access harder. I would recheck the layout before committing.

How to Choose the Right No Hub Fittings? - Match the Fitting Configuration to the Plumbing Layout

Plumbing Layout or Need Common Fitting Configuration Typical Application Selection Considerations
Continue a straight horizontal or vertical run Straight no-hub pipe or fitting with plain ends Connecting sections of no-hub cast-iron drainage pipe along the same line Match the nominal pipe size and confirm that the adjoining ends are compatible with the specified no-hub coupling.
Make a gradual 45-degree change in direction 45-degree bend (1/8 bend) Routing a drain around an obstruction or changing direction while avoiding a sharper turn Check the available space and the direction of flow. The fitting angle describes the change in direction, not the pipe slope.
Make a 90-degree change in direction 90-degree bend (1/4 bend) Turning a drainage line at a wall, floor, or other layout transition Verify that the bend pattern and installation orientation suit the drainage use and applicable local code.
Connect a branch to a vertical drainage stack Sanitary tee Joining a fixture branch to a vertical stack in an approved drainage arrangement Use the branch and run in the intended orientation. A sanitary tee is generally not used to connect a horizontal drain into another horizontal drain.
Join a horizontal branch to a horizontal drain Wye, or combination wye and 1/8 bend Bringing waste flow into a horizontal drainage line with a directional entry Orient the branch with the direction of flow and provide the required slope. Confirm the fitting arrangement against local plumbing code.
Reduce or increase the pipe size Reducer fitting or correctly sized transition coupling Connecting drainage components with different nominal pipe sizes Check both end sizes and the required direction of flow. A coupling is not a substitute for a fitting that changes the direction or branching layout.
Provide access for clearing a drain Cleanout fitting with a removable plug Creating a service access point on a drainage line Position the cleanout where it remains accessible after construction and finishes are installed; follow code requirements for access and placement.
Connect no-hub cast-iron pipe to a different pipe material or system Listed transition coupling matched to the two pipe materials and outside diameters Making a material transition in a drainage or sewer connection where permitted Use a coupling specifically rated for the materials, sizes, and application. Check local code and manufacturer installation instructions.
Join two plain-end no-hub pipe or fitting sections Shielded no-hub coupling of the appropriate size and specification Securing compatible no-hub cast-iron components at a joint Match the coupling to the pipe outside diameter and service requirements. Install and tighten it to the coupling manufacturer's instructions; do not rely on an unshielded rubber sleeve where a shielded coupling is required.

Check Compatibility, Code Requirements, and Installation Needs

How to Choose the Right No Hub Fittings?

Check Compatibility, Code Requirements, and Installation Needs

Start with the pipe, not the fitting label. Measure the outside diameter and confirm the pipe material, size, and application. ASTM A888 covers hubless cast-iron soil pipe from 1½ to 15 inches; that range is a useful check, not a guarantee that every coupling will fit. For mixed materials or older pipe, verify the coupling is listed for that exact connection. I still measure twice. Cast iron can be chipped or slightly out of round.

Check the code adopted by your local authority before buying. The International Plumbing Code lists approved drainage materials, while ASTM C1277 and CISPI 310 provide standards for hubless couplings. Confirm that the fitting suits the location, such as above-ground drainage or a buried run, and follow its listing and the applicable code. Requirements can vary by jurisdiction. Don’t assume a general-purpose coupling is acceptable everywhere.

Tip: Clean pipe ends, seat the gasket evenly, and tighten bands to the coupling maker’s torque specification with a torque wrench. A crooked shield or uneven gap can cause leaks. Support the pipe before tightening, then test the completed line as local code requires. Small details matter.