What Are Ducting Clips and How Are They Used?
Ducting Clips are small components with a practical job: they secure flexible or semi-rigid ductwork, limit movement, and help maintain a stable airflow path. They may appear insignificant. They are not. A loose clip can allow a duct to sag, rub against framing, or pull away from a connection. These faults can create air leakage, noise, condensation, and uneven room temperatures. ENERGY STAR reports that typical duct systems can lose around 20% to 30% of conditioned air through leaks and poor connections. Ducting Clips cannot solve every leakage problem, but correct fastening supports better installation quality.
The wider energy context makes this detail more important. The 2023 Global Status Report for Buildings and Construction, published by UNEP and the Global Alliance for Buildings and Construction, states that buildings consume about 30% of global final energy. It also identifies building operations as a major source of energy-related emissions. In this setting, small installation decisions deserve closer attention. This guide explains what Ducting Clips are, where installers use them, and how selection affects duct stability. It will consider clip materials, sizing, spacing, and compatibility with insulation. It will also address common errors, including over-tightening, weak fixing points, and unsupported duct runs. There is no universal clip. That assumption is easy to make, and often wrong. Proper practice should follow manufacturer instructions, project specifications, and recognized standards such as SMACNA’s HVAC Duct Construction Standards. Reliability begins with details that are easy to overlook.
What Are Ducting Clips and What Do They Do?
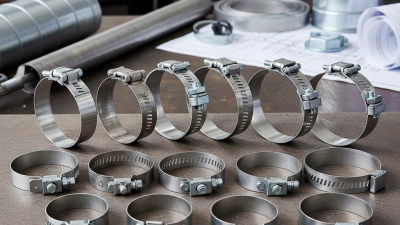
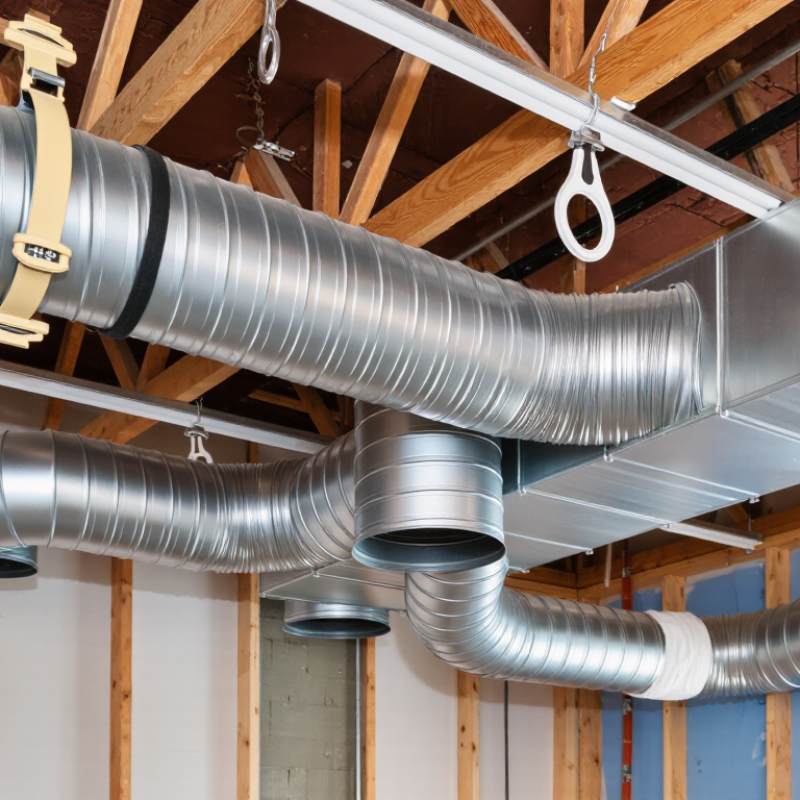
Ducting clips are fastening components that hold flexible or rigid duct sections in position. They may secure a duct to a collar, join sections, or attach ducting to a support. Common designs include metal bands, screw-tightened clamps, and plastic clips. The right type depends on duct diameter, material, and location. A clip should hold firmly without crushing the duct wall. Small parts matter. The U.S. Department of Energy’s Energy Saver guidance estimates that typical homes lose 20 to 30 percent of duct air through leaks, holes, and poorly connected ducts. Clips can help stabilize connections, but they do not replace proper sealing.
During installation, a worker usually places the duct fully over the fitting, tightens the clip, then checks that the joint stays aligned. For suspended flexible duct, separate supports help prevent sagging and sharp bends that restrict airflow. A clip alone is not a support system. It is also worth checking clips after maintenance or vibration, since a loose connection can go unnoticed above a ceiling or in an attic. The detail is easy to miss. Follow the duct and clip manufacturers’ instructions, and use a qualified HVAC professional when the connection is inaccessible or damaged.
What Are Ducting Clips and How Are They Used?
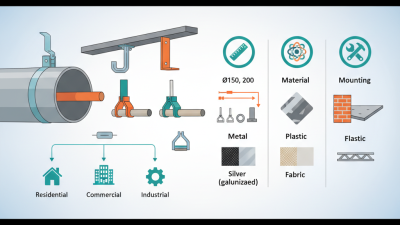
Ducting clips secure ductwork to a supporting surface or structure, helping keep it in position. Choose a clip that fits the duct’s nominal diameter. The chart converts common nominal round-duct sizes from inches to millimetres (1 inch = 25.4 mm).
What Are the Main Types of Ducting Clips?
Ducting clips generally fall into three groups. Support clips or saddles cradle round ducts against joists, walls, or ceilings. They spread the load and help prevent the duct from sagging. Suspension clips connect ductwork to straps or rods, keeping longer runs level. Joining clips and clamps secure flexible duct to collars or connect compatible duct sections. They need the right diameter and a firm fit; a loose connection can leak even when the duct looks neatly installed.
The U.S. Department of Energy’s Energy Saver guidance estimates that 20–30% of the air moving through a typical home’s duct system may be lost through leaks, holes, and poor connections. Clips alone cannot prevent that loss, but suitable fasteners can help maintain stable connections and support. Material matters, too: metal clips are commonly chosen for rigid duct support, while lighter plastic clips may suit low-load applications. Always check the duct maker’s installation instructions and the clip’s load rating.
Tips: Measure the duct before buying clips. Check the load. Keep support points evenly spaced, and avoid crushing flexible duct with an overtightened clamp. A clip can feel secure yet still distort the duct; inspect the finished run for gaps, pinches, and sagging.
How Do Ducting Clips Secure and Support Ductwork?
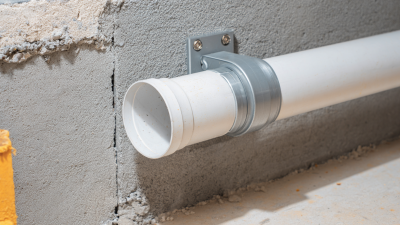
Ducting clips hold a duct in position by connecting it to a stable surface, such as a joist, wall, or ceiling frame. Depending on the duct type, installers may use saddle-shaped clips, clamps, or clips paired with support straps. The support should fit the duct without crushing it. For flexible ducts, keep the run gently extended and avoid sharp bends that restrict airflow. Small details matter.
Clip spacing depends on duct material, diameter, weight, and the project specification; there is no safe universal spacing for every system. Installers should follow the duct manufacturer’s guidance and applicable mechanical design requirements. Place supports near changes in direction and connections, while keeping access panels and joints reachable. A clip supports the duct, but it does not seal a leaking joint. That distinction is easy to overlook.
The U.S. Department of Energy’s Energy Saver guidance reports that a typical home may lose 20% to 30% of the air moving through its ducts through leaks, holes, and poorly connected sections. Proper support can help limit sagging and stress that may contribute to loose connections, but clips alone cannot prevent leakage. Still, they are not magic. Check that each duct stays aligned after fastening, and avoid overtightening clips that could deform the duct or its insulation.
How Are Ducting Clips Installed Step by Step?
Before installing ducting clips, check that their size and shape match the duct. A clip that is too tight can deform flexible ducting, while a loose one may let it sag. Read the clip and duct instructions, and confirm the supporting surface is sound. Mark the route with a pencil, keeping bends gentle and access points clear.
Measure the recommended support spacing for your duct type; there is no single spacing that suits every system. Mark each fixing point, then check for hidden wiring or pipes before drilling. Use suitable screws and wall plugs for the surface. Attach the clip bases firmly, but avoid overtightening and cracking plastic parts. A small pilot hole helps on timber.
Place the duct into each clip and close the retaining strap or cover as designed. Keep it snug. Not crushed. Check that joints remain seated and the duct does not rub against sharp edges. Switch on the system and listen for rattles; inspect the run for dips or pinched sections. If a clip shifts or the duct still sags, reassess the fixing surface and spacing rather than forcing the clip tighter. It is easy to rush this part. A neat run is not always a supported run.
How Should You Choose the Right Ducting Clips?
What Are Ducting Clips and How Are They Used?
How Should You Choose the Right Ducting Clips?
Ducting clips secure ventilation ducts to walls, ceilings, or other supports. They help keep a run in position and limit sagging, rattling, and strain on joints. The right clip depends on the duct’s shape, diameter, and material. A clip that is too tight can flatten flexible ducting and restrict airflow. Fit matters.
Check the clip’s stated size range against the duct’s actual outside diameter. Consider the surroundings, too: damp areas may need corrosion-resistant material, while warm spaces require clips rated for the expected temperature. Think about the mounting surface and the duct’s weight, especially on long horizontal runs. Follow the clip maker’s guidance on support spacing; one clip rarely suits every installation. If the duct vibrates, a lined clip may help reduce noise, but it should still hold the duct securely without crushing it. Check twice.
Tips: Measure before buying, and test one clip before fitting a full run. Keep clips aligned, use suitable fasteners for the surface, and inspect joints after installation. A small gap or uneven support can become noticeable later, so recheck the run once the system is operating.