Riser Clamp Essential Tips for Installation and Use
In the world of construction, the Riser Clamp plays a critical role. David Johnson, a leading expert in plumbing systems, once said, "A reliable Riser Clamp can make all the difference in safety and efficiency." Installing Riser Clamps correctly is vital to prevent pipe damage and ensure stable vertical support for various systems.
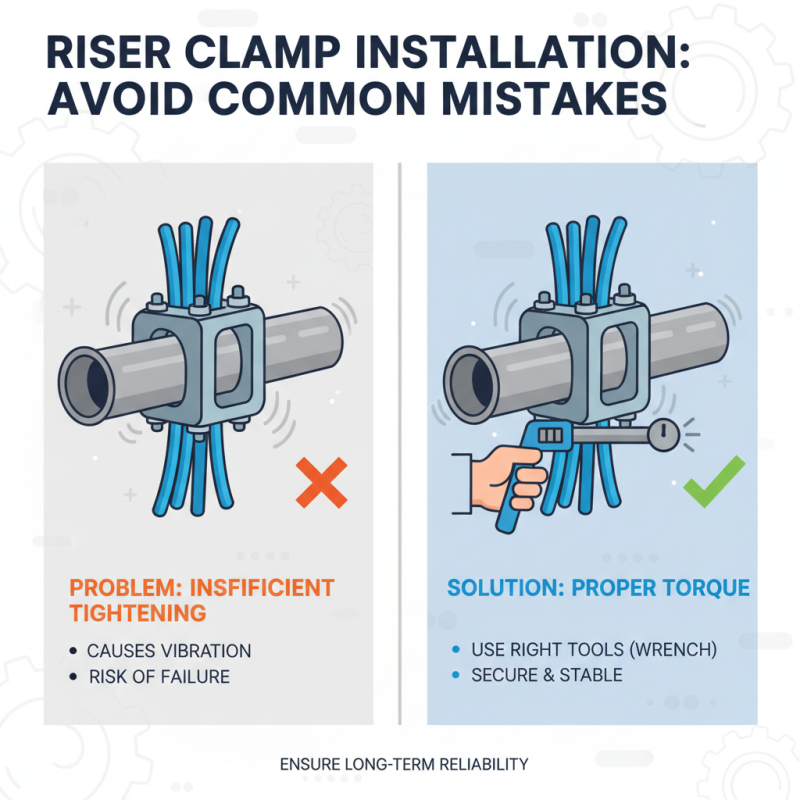
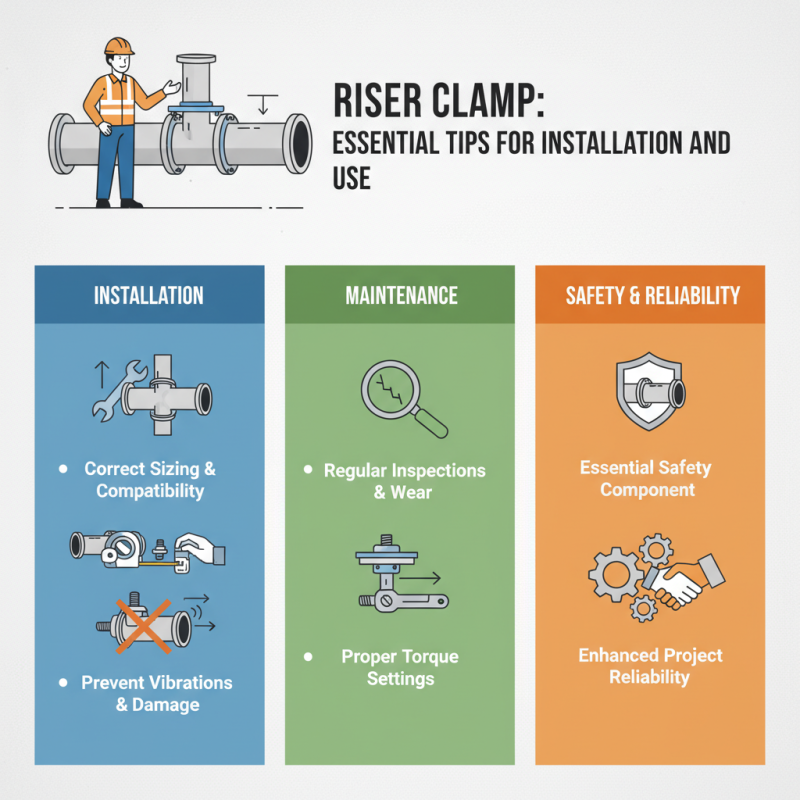
Improper installation can lead to serious issues. Loose clamps may cause vibrations, leading to long-term damage. Choosing the right size is essential, too. A poorly fitting clamp can hinder performance. Always check for compatibility with your pipes. Reflecting on past mistakes can guide improvements in future projects.
Proper maintenance is equally important. Regular inspections can help identify wear and tear. Don't overlook the importance of proper torque settings during installation. Riser Clamps are not just tools; they are essential safety components. Understanding their correct use enhances overall project reliability and safety.
Understanding Riser Clamps: Types and Applications
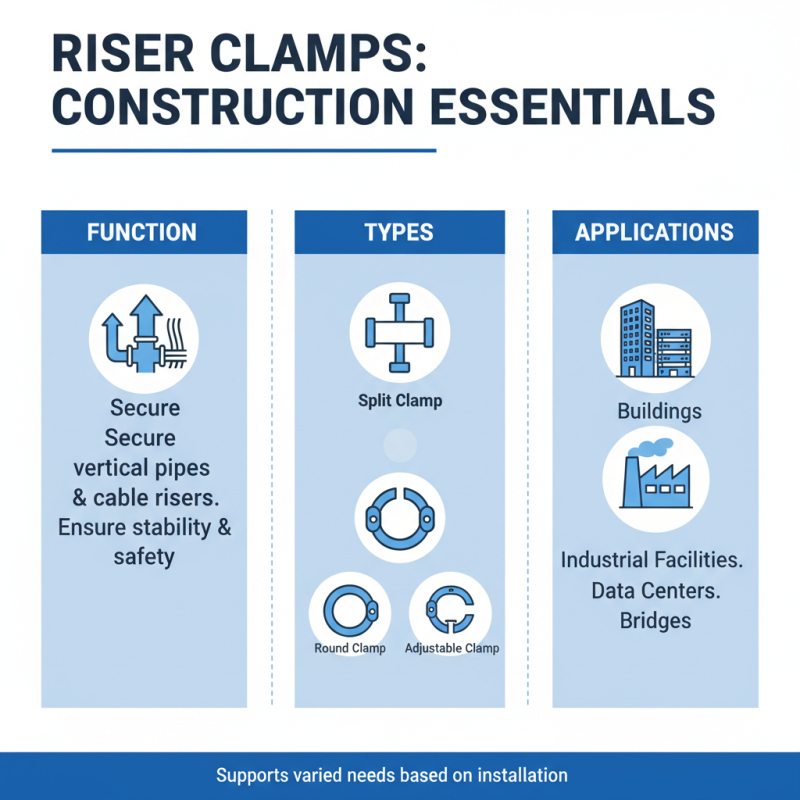
Riser clamps are essential components in various construction applications. They secure vertical pipes and cable risers, ensuring stability and safety. There are several types of riser clamps available, including split clamps, round clamps, and adjustable clamps. Each type serves specific purposes, offering varied support depending on the installation requirements.
According to industry reports, proper use of riser clamps can reduce maintenance issues by up to 40%. This statistic highlights the need for careful installation. Many times, installers overlook the importance of selecting the right type of clamp. For instance, a split clamp could be more advantageous in reducing stress on the pipe than a standard round clamp. Likewise, adjustable clamps allow for easy modifications but could lead to oversights if not monitored.
Misalignment during installation can lead to significant problems. If clamps are too tight, it may lead to damage. Conversely, loose clamps can result in pipe movement or even disconnection. Regular inspections are vital in ensuring that clamps maintain their integrity over time. Attention to detail in these areas can make a considerable difference in the overall lifespan of the installation.
Key Considerations for Riser Clamp Installation
When installing riser clamps, a few key considerations can ensure a successful job. Proper alignment is crucial. Misalignment can lead to structural issues and may compromise overall system integrity. Make sure the riser clamp fits the pipe snugly without being too tight. This balance is essential for preventing damage.
According to industry reports, about 30% of installation failures stem from improper clamp alignment.
Tip: Always check load ratings. Each riser clamp has specific load limitations. Exceeding these limits can result in clamp failure. Confirm that the installed clamps can support the weight of the pipes and any additional loads they may carry. Regular inspections are vital. A good practice is to assess clamps for any signs of wear, especially after extreme weather conditions.
For optimal performance, consider the environment. Some materials are more suited for corrosive environments than others. This decision can impact the longevity of the installation.
A recent study indicated that 20% of failures in pipe support systems were due to environmental factors. Remember, attention to detail during installation can save time and avoid costly repairs later.
Step-by-Step Guide to Properly Installing Riser Clamps
Installing riser clamps correctly is crucial for ensuring the safety and functionality of piping systems. A study from the National Fire Protection Association (NFPA) indicates that improper clamp installation can lead to up to 30% more risk of system failure. Following a systematic approach makes a significant difference. Start by selecting the right clamp size for your piping material. Each clamp should fit snugly, allowing for thermal expansion without restrictions.
In the installation process, it’s vital to clean the installation area. Debris can hinder the effectiveness of the clamp. Apply the clamp around the pipe, ensuring it sits flat against the surface. Use a torque wrench to secure the bolts appropriately. The American Society of Mechanical Engineers (ASME) recommends specific torque values for different materials. Over-tightening can damage both the clamp and the pipe, leading to leaks.
Many users often overlook the importance of regular inspections. It is suggested that you check installed clamps every six months. Look for signs of wear or corrosion. Making adjustments at this stage can prevent larger issues later. Not everyone performs these checks routinely, leading to increased repair costs. Reflecting on these steps might reveal gaps in your installation technique, urging a review of your methods.
Riser Clamp Usage Analysis
Maintenance Tips for Ensuring Long-Term Riser Clamp Performance
When it comes to ensuring your riser clamps perform well over time, regular maintenance is key. Checking the clamps for wear and tear is crucial. Rust, for example, can weaken the material. It's essential to inspect them every few months, especially if they are exposed to moisture. Cleaning the clamps with a soft brush can prevent dirt buildup. Keep them dry when not in use.
Lubrication plays an important role, too. Applying an appropriate lubricant can enhance the clamps' functionality. However, avoid excess lubricant. Too much can attract dirt and cause issues later on. Ensure all fasteners are tight. Loose connections can lead to failures during use. You might notice odd sounds or vibrations if they’re not secure.
Reflect on your installation environment. Is it industrial or residential? The demands vary greatly. Harsh conditions require more care. Document your maintenance routine. This helps track regular checks and any repairs made. Identifying patterns in wear can aid in proactive maintenance. It’s not just about installing clamps; it’s about nurturing them for longevity.
Riser Clamp Essential Tips for Installation and Use
| Tip |
Description |
Frequency |
| Proper Alignment |
Ensure the clamp is aligned correctly with the riser to prevent stress and misalignment. |
Before Installation |
| Use of Lubricants |
Apply suitable lubricants on bolts to minimize wear and make future maintenance easier. |
Regularly |
| Torque Specifications |
Follow the manufacturer's torque specifications to ensure a secure fitting without damage. |
Every Installation |
| Visual Inspections |
Conduct visual inspections for signs of wear, corrosion, or damage. |
Monthly |
| Cleaning |
Keep clamps clean from debris and contaminants to maintain performance. |
Bi-Weekly |
| Replacement Schedule |
Establish a replacement schedule based on usage and environmental conditions. |
Annually |